Replenishment Planned Sales Demand is a way for the user to plan for future fluctuations in sales for an item. This could happen due to some event taking place in the future.
Accessing Replenishment Planned Sales Demand
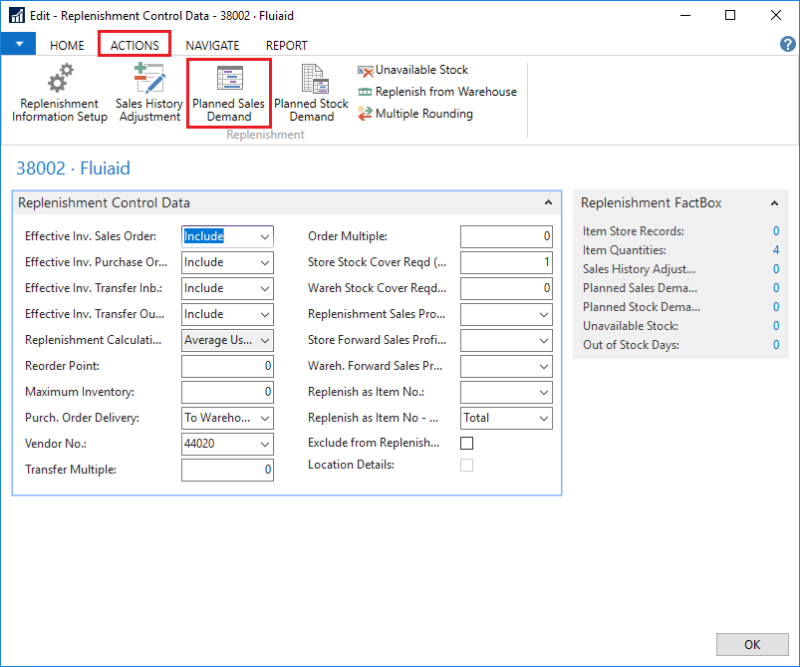
The Planned Sales Demand is accessible in the Replenishment Control Data of an item, provided the item has a Replenishment Calculation Type Average Usage or Manual Estimate.

You will find the Planned Sales Demand action on the Actions menu.
Replenishment Planned Event
When setting up the Planned Sales Demand, you can link the demand line to an event. This will provide the link between the planned sales demand and the event that caused the sales demand.

To set up an Replenishment Planned Event
- Navigate to the Replenishment Planned Event page ( LS Retail - Replenishment - Automatic - Replenishment Planned Event).
- Click the New action.
- Fill in all the fields as needed.
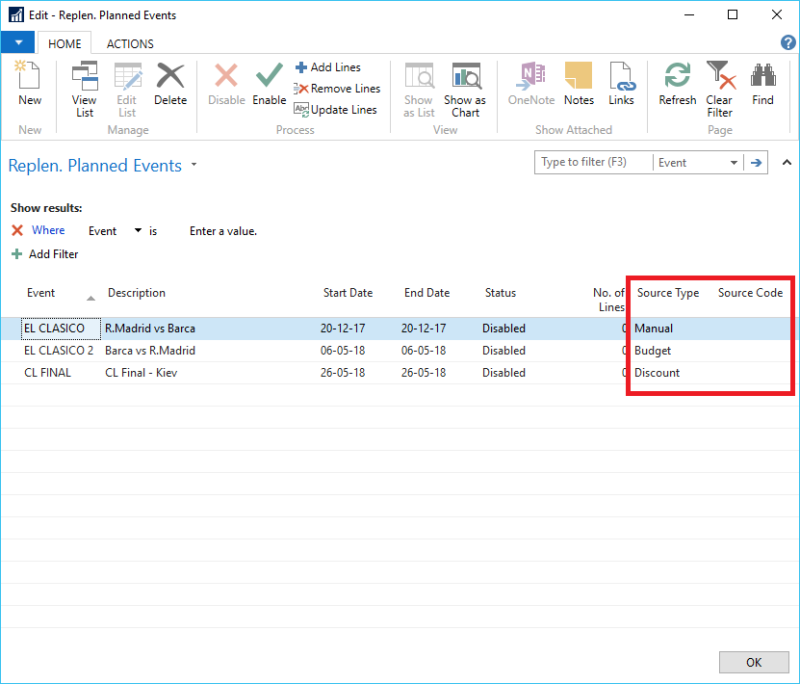
- In the Source Typefield, you can link the event to either Budget, Discount, or Manual. See below for more details.
Note: Keep in mind that you must enable a planned event before it can be used.
Source Type and Source Code
When linking the event to the Source Type and Source Code, it is important to remember that there is no validation done between the event and the source codes. This means that the system will not check if the event's date and the budget's date overlap or not.
The Source Type and Source Code fields are meant to be for informational usage only. A budget or discount offer can be linked to one event only.
Budget
You can only link the event to a budget of the type Item and a Day period.
Discount
You can only link the event to a periodic discount of type Disc. Offer or Multibuy.
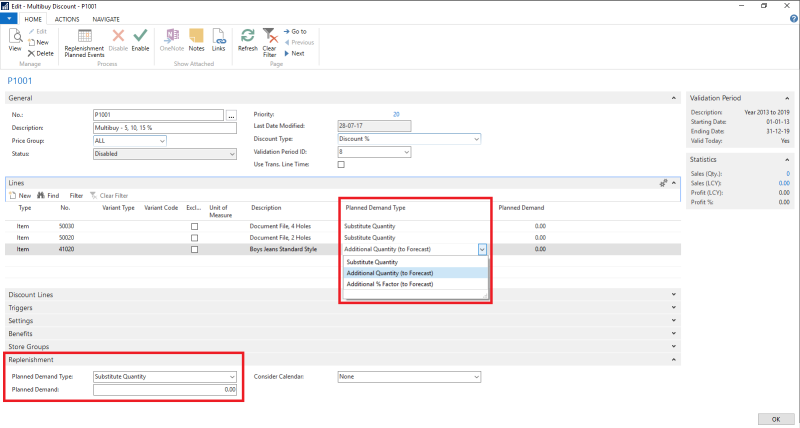
While setting up the Discount Offer's lines, you can set up the Planned Demand Type for each line.
Note: The Planned Demand Type and Planned Demand value for at each line will default to the value that is set up on the Replenishment FastTab. If you want to create a line with a different Planned Demand Type or Planned Demand value, you will have edit the line manually after creating it.
Manual
When you select a Manual Source Type, the Source Code field is a free text field where you can enter any descriptive text of your choice.
Setting up a Planned Sales Demand
There are three ways to set up the Planned Sales Demand:
- One is to manually insert one Planned Sales Demand line at a time.
- The other way is to bulk insert a Planned Sales Demand using the report on the Actions menu.
- The third is to remove and update using the report.
To manually insert a Planned Sales Demand
- Navigate to the Replen. Planned Sales Demand page.
- Click the New action.
- Fill in all the fields as needed. The fields Item No., Location Code, Planned Demand Type, and Date are mandatory and must be filled up for every line.
To insert lines into Planned Sales Demand via Replen. Planned Event (the Add, Remove, or Update Lines actions)
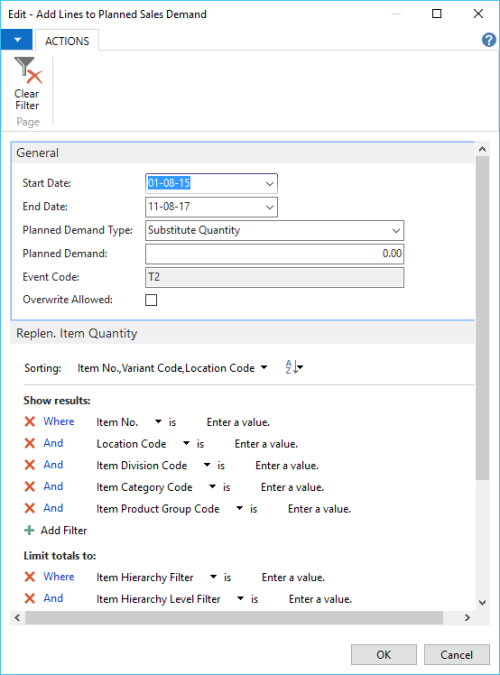
When you create an event, you can create or remove planned sales demand lines using the Add Lines, Remove Lines, or Update Lines actions. These action are accessible on the Process group. The actions are usable only when the event is disabled.
It is not recommended to add planned sales demand lines into an event that is linked to either Budget or Discount Source Type. Instead, add the lines in their respective pages which are the Retail Sales Budget and Discount Offer pages. See the next section for more details.
When creating, removing, or updating the lines, you can filter the planned sales demand's dates, type, value, items, locations, and so on using the report.
To insert lines into Planned Sales Demand via the Create Planned Sales Demand action (Budget and Discount Source Types)
There are two places where you can insert lines into the planned sales demand using the Create Planned Sales Demand action. One is available in the Retail Sales Budget page, and the other is on the Discount Offer or Multibuy Discount pages.
The first is accessible in LS Retail - Replenishment - Open-to-Buy - Retail Sales Budget List. In this list page, you can access the individual retail budget by clicking the Sales Budget action and the Retail Sales Budget page will appear.
The Create Planned Sales Demand from Budget is on the Actions menu.
In order to create planned sales demand lines with this action, the budget must have Budget Period Length Day, Budget Type Item, and have budget lines assigned to stores. To make it easier to create a planned sales demand, you can create a budget at a high level and use the Breakdown to Days, Items, or Stores action to break down the budget. Once the budget is in the correct format, you can create planned sales demand lines from the budget. See How to: Break Down a Sales Budget for more details.
You can access the Discount Offer page in LS Retail - BackOffice - Sales & Marketing - Pricing, Offers and Coupons - Offers - Discount Offers. For Multibuy Discount, navigate to LS Retail - Member Management - Offers - Multibuy Discounts. You can access the individual discount by clicking the View action and the following page will appear:
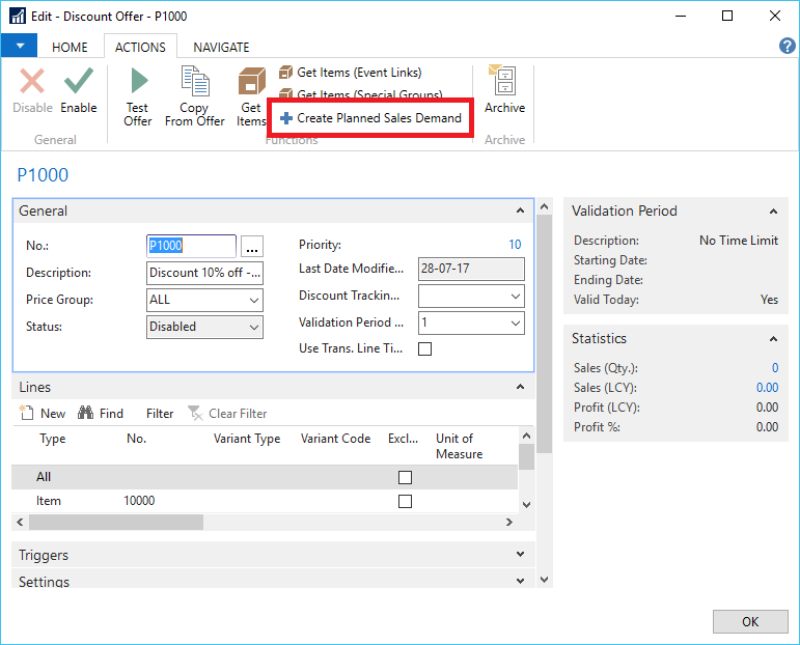
The Create Planned Sales Demand action is on the Actions menu. There are a couple of conditions that must be satisfied before you can create a planned sales demand lines from the discount:
- For each line in the discount page, the Planned Demand Type must not be empty before you can create a planned sales demand line for the discount.
- The event that is linked to the discount must be disabled.
Planned Demand Type
There are three types for the field Planned Demand Type:
- Substitute Quantity
- Additional Quantity (to Forecast)
- Additional % Factor (to Forecast)
There are two rules to remember when you are adding lines to the Planned Sales Demand:
- It is possible to add multiple lines of Planned Sales Demand for an item, location, or a date combination, but there can only be one line that uses the Planned Demand Type of Substitute Quantity.
- If there are multiple lines of Planned Sales Demand that have both Substitute Quantity and Additional % Factor, the Substitute Quantity will take higher priority first. This means that the existing planned demand value will be substituted first, and the % factor will be calculated based on the substituted value.
Substitute Quantity
This will substitute the existing base planned sales demand value to use the value that is newly defined by the user.
Additional Quantity (to Forecast)
This will add additional value to the existing base inventory value.
Additional % Factor (to Forecast)
This will add additional value based on % factor to the existing base inventory value. If there is another line of Additional Quantity (to Forecast) on the same item, the % factor will only be calculated on the base value. If there is another line of Substitute Quantity, the % factor will be calculated on the substituted value.